It's crunch time here at Happy Cactus Designs with the National Stationery Show coming up in less than two months. I have a number of new products in the works that I can't share here just yet, but I'm very excited about them and hope to be able to show you what they are soon!

Above is a snippet of what life is like these days: tackling an enormous to-do list, figuring out what color my booth walls will be, and sorting through a sea of cards. This year I am moving to a corner booth (#2240) and have been spending hours figuring out its design. This week my focus has been on finalizing my pre-show mailer that will be sent to retail shops, designing the packaging for new products, and figuring out how my products will be displayed in my booth. I can't wait to see how it all comes together!
It's that time of year when many artists and small business owners like myself are taking part in local craft fairs and holiday shows. I love doing these types of shows because it's a great way to meet customers face-to-face, get feedback on products, meet other artists, and, of course, sell your goods.

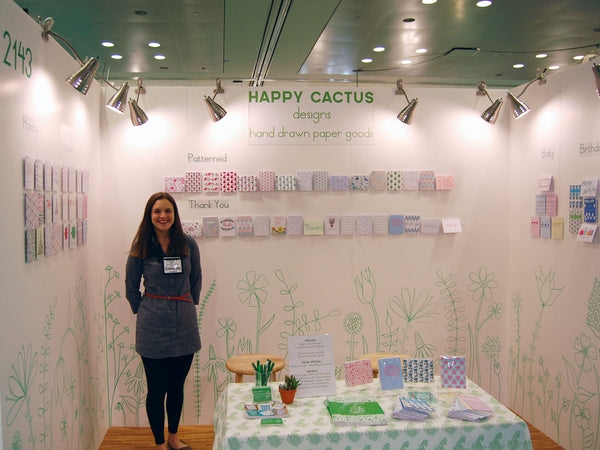
I wanted to share the details of my booth design for the National Stationery Show! When I was planning to exhibit for the first year, I found other stationery companies' blogs with similar posts be extremely informative and helpful, and I wanted to do the same for anyone out there thinking of jumping down the tradeshow rabbit hole.
The Walls
Since this was my first year to exhibit, I wanted to keep things simple, while still doing my best to show off my designs. I had Manny Stone do white foam core walls, and then used velcro dots to adhere the cards to the wall. The genius to leveling all of the cards and keeping things straight - tape measure washi tape! This was probably my best pre-show purchase. It made lining up the cards beyond easy. I didn't have to worry about making marks on the walls or the top layer of the walls peeling off. (See similar here.)


My favorite part of the booth was the hand drawn walls. I actually hadn't originally planned to do this. Given that all of my designs are hand drawn, I thought it would be both eye-catching and a great talking point to have large-scale hand drawn flowers along the walls. We ran out and got thick permanent markers, I sketched a rough design on a sheet of paper, and then went to town on the walls. There was no turning back once I started!

Lighting
I purchased clamp lamps from Home Depot. I had heard from many past exhibitors that lighting is one of the most important features of your booth, and I wanted to make sure that my designs were well lit. Each lamp was 60 watts, and the combined light from 8 lamps proved to be perfect. Being under the lower ceilings of the Javits helped keep things on the brighter side, too.
Flooring
For flooring, I used interlocking foam tiles. Armed with a generous discount code, I was able to purchase the tiles for a great price. They proved to be very comfortable to stand on all day and I even had retail buyers remark about how nice the floor felt!
Signage
I originally had a vinyl decal of my company name and tagline that I intended to place on the back wall, but I got freaked out that would completely ruin it since each tiny letter was a separate piece. I ended up using a canvas sign that I had also printed. I did end up using vinyl decals for my booth numbers. Next year, I definitely want to have a better/cooler sign made.

Furniture and Accessories
Since I live far from NYC and wasn't shipping a pallet of goods, I needed to keep the furniture simple and as inexpensive as possible. I rented a small table from Freeman and had a fabric runner/topper made with my paisley print. I used a flame-retardant full-length tablecloth beneath it. Hidden under the table were storage cubes holding all of the supplies I needed during the day. Next year, I think I'd want something a little more accessible, as I found myself fishing under the table a lot. We picked up two wooden bar stools at a nearby department store to perch on during the day.

On the table, I displayed some boxed sets of cards and some singles so buyers could see how items were packaged. I also had a sign with details about my products (pricing, minimums, show special, etc.). I was a little worried about putting all of that out there, but buyers seemed to appreciate it. I also had business cards, extras of my pre-show mailer postcard, and my catalog. One of the best things I did was to putting all of my cards on large key rings. I found that buyers really liked to flip through them so they could touch the cards, look at designs up close, find their favorites, etc.

I was really pleased with how the booth turned out. I received many compliments that the design was fresh, bright, and appealing. I was also very lucky to avoid any major disasters or errors (I've heard some crazy stories of leaking and walls falling). And, of course, I'm already thinking of plans for next year's booth design!