July 18, 2012

I stumbled upon the music of The Lumineers about a month ago and their first full-length album has quickly become my summer soundtrack. Their folk rock sound is pretty infectious - think long ballads, foot stomping, hand clapping...So for this week's doodle, I took some lyrics from their song "Ho Hey" and worked on a little hand lettering. The background is a picture from the magical Cannon Beach, Oregon, that I took last summer. Here's the original music video if you are looking for a little blog reading soundtrack.
July 16, 2012



July 11, 2012
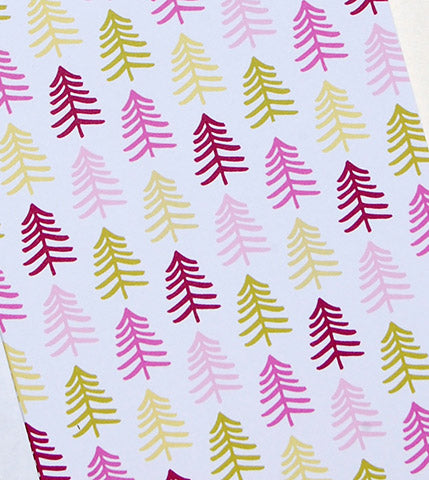
For some reason, I've had turquoise on my mind a lot lately. I love the different shades and used this week's doodle to see how they play off one another. What do you think?

July 09, 2012
We had a great time this past Saturday at our first Austin Flea. We loved meeting lots of other local Austin artists, jewelers, and crafters, and appreciated all of the shoppers who came out on a hot July day!

July 05, 2012
Happy Cactus Designs relocated from NYC to Austin a few months ago, and we're very excited to participate in our first Austin Flea this Saturday, July 7! The Austin Flea brings together local artists, purveyors of vintage goods, and food vendors all under one roof - The Highball on South Lamar. Admission is free. Learn more at the Austin Flea Facebook page. We hope to see you this Saturday!

July 04, 2012
Hope everyone is having a fun and safe Fourth of July. Enjoy the fireworks lighting up the sky!

July 02, 2012
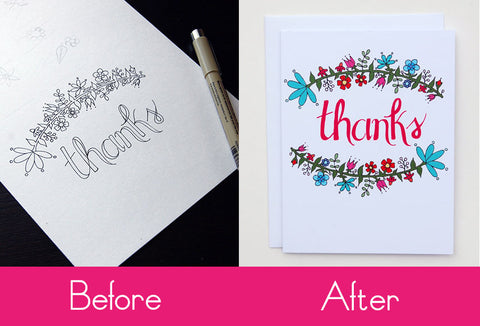
I thought I'd pull back the curtain a bit and give you a peek inside my creative process. Each of the cards you see in the shop is originally drawn by hand - by me! So just how does a design go from an idea in my mind to a sketch to a finished card? Here's a glance at the different steps in my creative process.
Doodling
I find myself doodling a lot. My sketchbooks are filled with random drawings and words. Some go nowhere, some turn into the cards you see for sale on this site, and some I revisit months later with renewed interest. Here's some recent sketches I've done.

Pen to Paper
Usually I'll take a preliminary sketch I've drawn and create something in ink. Sometimes I sketch out the design first in pencil; sometimes I just go for it with ink and hope I don't make a big mistake. Armed with some very fine black ink pens, I'll spend time drawing the motifs or patterns on drawing paper. I'm lucky to have a very steady hand.

Here's the original ink drawings for Thanks Vines, Busy Flowers, and Zinnias. With both of the designs for Busy Flowers and Zinnias, I didn't have a set design in my mind - each piece just grew as I went along.


Clean Up and Color
I scan my artwork and use software on my trusty computer to smooth lines, clean up mistakes, and color the artwork. I love playing around with different color combinations and seeing the different possibilities.
The End Result
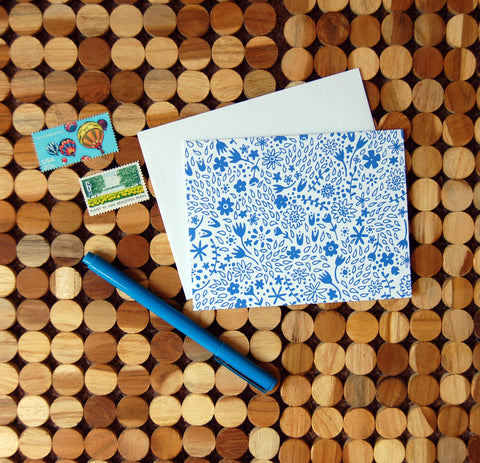
The final products printed, scored, and ready to be sold!
June 27, 2012
I'm going to start a new series on this blog to share my ongoing projects with you and other drawings that come out of my doodling and brainstorming. Here's a simple little bunny surrounded by flowers that grew out of a project I was working on yesterday.

June 20, 2012
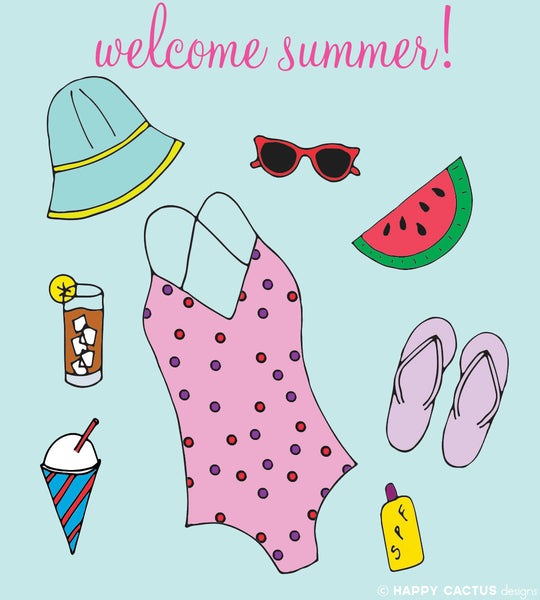
Summer is officially here, but it's felt like summer in Austin for many weeks already. Looks like we'll be seeing a steady stream of 100 degree days soon! This is my first summer back in Texas since 2008 so I'm definitely re-acclimating to the heat. Here's a little drawing I did in honor of the official kickoff of summer. I was inspired by all of those magazine articles I come across with layouts of "summer essentials." Here's mine!
June 11, 2012
I've been a spending a lot of time lately mulling over creativity and what it means to be creative. Much of this thinking was driven by an awesome new book called Imagine: How Creativity Works by Jonah Lehrer.

Lehrer examines the science of creativity and where our creative ideas come from, how we confront mental blocks, and how we discover and share new insights and breakthroughs. As an artist, new ideas can sometimes come quickly and I find myself trying to capture on paper what's happening in my head as fast as I can. At other times, I can feel very "un-creative," as if there's a roadblock preventing the free flow of ideas. Fortunately, as of late, I've had a lot of new ideas for both products and designs popping into my head. After spending so much time on the business-side of things in preparation for the National Stationery Show, it's been a welcome change to devote more time to drawing, doodling, brainstorming, researching, etc. My favorite quote in the book comes from graphic designer Milton Glaser (known for coming up with the iconic "I Heart NY" campaign). Glaser says:
"There's no such thing as a creative type. As if creative people can just show up and make stuff. As if it were that easy. I think people need to be reminded that creativity is a verb, a very time-consuming verb. It's about taking an idea in your head, and transforming that idea into something real. And that's always going to be a long and difficult process. If you're doing it right, it's going to feel like work."
After finishing Lehrer's book, I stumbled across two items on the web related to creativity. First, The Design Trust's article on boosting your creative thinking gives brief but important tips for getting creative as well as ideas for creatively thinking about you run your business. Then, I saw this short motion graphic video from the 99% Conference comprised of short quotes from well-known thought leaders about the importance of hard work, goal setting, and overcoming obstacles. All three of these pieces have really inspired me to think more about the creative process in general and my own process in particular.
May 31, 2012


May 27, 2012
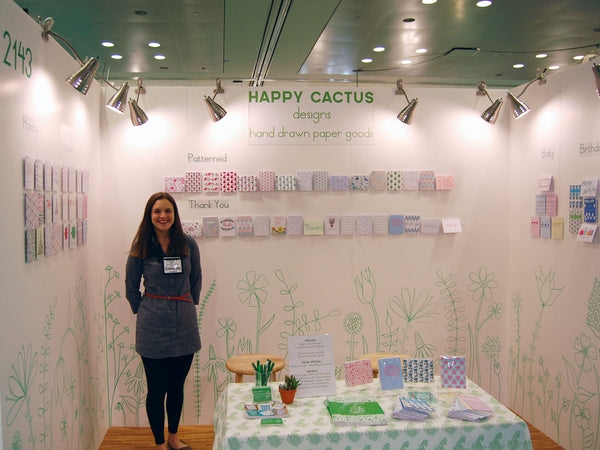
I wanted to share the details of my booth design for the National Stationery Show! When I was planning to exhibit for the first year, I found other stationery companies' blogs with similar posts be extremely informative and helpful, and I wanted to do the same for anyone out there thinking of jumping down the tradeshow rabbit hole.
The Walls
Since this was my first year to exhibit, I wanted to keep things simple, while still doing my best to show off my designs. I had Manny Stone do white foam core walls, and then used velcro dots to adhere the cards to the wall. The genius to leveling all of the cards and keeping things straight - tape measure washi tape! This was probably my best pre-show purchase. It made lining up the cards beyond easy. I didn't have to worry about making marks on the walls or the top layer of the walls peeling off. (See similar here.)


My favorite part of the booth was the hand drawn walls. I actually hadn't originally planned to do this. Given that all of my designs are hand drawn, I thought it would be both eye-catching and a great talking point to have large-scale hand drawn flowers along the walls. We ran out and got thick permanent markers, I sketched a rough design on a sheet of paper, and then went to town on the walls. There was no turning back once I started!

Lighting
I purchased clamp lamps from Home Depot. I had heard from many past exhibitors that lighting is one of the most important features of your booth, and I wanted to make sure that my designs were well lit. Each lamp was 60 watts, and the combined light from 8 lamps proved to be perfect. Being under the lower ceilings of the Javits helped keep things on the brighter side, too.
Flooring
For flooring, I used interlocking foam tiles. Armed with a generous discount code, I was able to purchase the tiles for a great price. They proved to be very comfortable to stand on all day and I even had retail buyers remark about how nice the floor felt!
Signage
I originally had a vinyl decal of my company name and tagline that I intended to place on the back wall, but I got freaked out that would completely ruin it since each tiny letter was a separate piece. I ended up using a canvas sign that I had also printed. I did end up using vinyl decals for my booth numbers. Next year, I definitely want to have a better/cooler sign made.
Furniture and Accessories
Since I live far from NYC and wasn't shipping a pallet of goods, I needed to keep the furniture simple and as inexpensive as possible. I rented a small table from Freeman and had a fabric runner/topper made with my paisley print. I used a flame-retardant full-length tablecloth beneath it. Hidden under the table were storage cubes holding all of the supplies I needed during the day. Next year, I think I'd want something a little more accessible, as I found myself fishing under the table a lot. We picked up two wooden bar stools at a nearby department store to perch on during the day.
On the table, I displayed some boxed sets of cards and some singles so buyers could see how items were packaged. I also had a sign with details about my products (pricing, minimums, show special, etc.). I was a little worried about putting all of that out there, but buyers seemed to appreciate it. I also had business cards, extras of my pre-show mailer postcard, and my catalog. One of the best things I did was to putting all of my cards on large key rings. I found that buyers really liked to flip through them so they could touch the cards, look at designs up close, find their favorites, etc.

I was really pleased with how the booth turned out. I received many compliments that the design was fresh, bright, and appealing. I was also very lucky to avoid any major disasters or errors (I've heard some crazy stories of leaking and walls falling). And, of course, I'm already thinking of plans for next year's booth design!
