April 01, 2013

March 26, 2013
It's crunch time here at Happy Cactus Designs with the National Stationery Show coming up in less than two months. I have a number of new products in the works that I can't share here just yet, but I'm very excited about them and hope to be able to show you what they are soon!

Above is a snippet of what life is like these days: tackling an enormous to-do list, figuring out what color my booth walls will be, and sorting through a sea of cards. This year I am moving to a corner booth (#2240) and have been spending hours figuring out its design. This week my focus has been on finalizing my pre-show mailer that will be sent to retail shops, designing the packaging for new products, and figuring out how my products will be displayed in my booth. I can't wait to see how it all comes together!
March 25, 2013


March 12, 2013
 Of the various elements that must come together to exhibit at the National Stationery Show, I think one of the most daunting is putting together a wholesale catalog. First of all, creating a 12+ page catalog is time consuming and requires painstaking attention to detail. Secondly, your catalog is one of the most important, if not the most important, marketing pieces that buyers see.
January 30, 2013

When I launched my company and joined the stationery industry, one of the most pleasant surprises was how friendly, kind, and welcoming other members of the paper world have been to me. I guess I originally expected that people would be competitive and not willing to share their experiences navigating this industry, but I have found the exact opposite to be true.
Preparing to exhibit at NSS for the first time is an especially daunting adventure. One of my key pieces of advice in the months leading up to the show is to get to know others in the stationery world - vendors, retailers, and, of course, other designers.
- Be active on Twitter and use the site as a platform for networking with with others. Don't be afraid to respond to others' tweets, compliment designers on their work, and ask questions. #nss and #stationeryshow tend to be the most frequently used hashtags for organizing tweets around NSS. Twitter has been the first place I've met many paper friends!
- I participate in Tradeshow Bootcamp (read more about my experiences here) which has become an amazing support network comprised of other designers to share experiences, ask questions, and get feedback on problems you may be having.
- Don't hesitate to email designers directly about their experiences. Be sure to visit a designer's contact page to see if they have specific instructions for the best way to make contact. Keep your emails fairly succinct and don't worry if a designer doesn't respond right away. In my experience, I've found that many designers are more than willing to share their tips.
- Read blogs and comment on them! Just like I attempt to do here, there are many other designers who have blogged about their NSS experiences. One of the best ways to locate designers' posts about NSS is to check their blog archives. Usually between the months of March and June you'll find NSS-related posts.
- Find others in your own town that are planning to be at NSS! There's nothing like getting together face-to-face with other paper people who live in your city and bouncing ideas off one another.
The best part of all of this networking is when you get to meet each other in person at the show! It's one of the rare times when all of your paper friends are in one place at the same time.
January 07, 2013
All of a sudden it's 2013, which means the National Stationery Show is mere months away. I'm beyond excited to be heading back to New York in May for my second NSS. While I've heard your first year is often your toughest (for all of the obvious reasons), I'm anticipating year two will take just as much grit, creativity, energy, etc. etc. if not more. I'll be sharing some of the lessons I learned from my first NSS experience here on the blog as well as general tips and info. When I was prepping to do the show for the first time I learned so much from other designers wiling to share their experiences and hope to help new exhibitors in the same way here.
So my first really big tip is to get organized and make a to-do list.
Buy a very large binder (mine from 2012 is above) and make sure to keep any and all Stationery Show-related documents here. In my binder, I include everything from contracts and official show documents to brainstorms I have and inspirational pictures and ideas. Start printing out important emails and put them in the binder. Trust me, this will save you time come April and May when you realize you need to bring hard copies of your important emails like correspondence with the show managers and travel confirmations with you to New York.
I use a large color-coded spreadsheet to track my to-do list. I prefer to create spreadsheets on Google Docs so I can access them from anywhere. For my to-do list, I make it pretty simple and uncomplicated. There are only five columns: 1) task, 2) due date, 3) actual date completed, 4) notes, and 5) any related URL to the task.
But with so many things to think about, where to begin?!
I start by adding in all concrete deadlines to my to-do list. This includes things like payment deadlines to various vendors, ordering deadlines for items like lighting and walls, and editorial deadlines set by print and online editors/bloggers.
Then, I break it down by major categories: Product, Marketing, Booth Design, Branding, Travel Plans. I work backwards and think of all of the sub-categories for these bigger ones. For example, with Branding, sub-categories may include items like business cards, website development and maintenance, and product photography.
I then go through and set tentative due dates for specific tasks. For example, I may set a due date of May 1 to have my new business cards ready in hand. Then working backwards, I'll set dates like April 1 to have brainstorming done, April 8 to have design prototype completed, and April 10 to have price quotes from different vendors done. I need to include room for printing and other factors, too. I break each task down like this. Yes, it leads to a super long and detailed to-do list, but my goals are to make sure I'm not forgetting steps and to reduce surprises.
With the spreadsheet, I make sure to enter the date the task was completed. This obviously ensures I know the task was completed, but it also makes me feel good when I get a task done ahead of the actual due date!
I tend to visit my to-do list multiple times a day (okay, sometimes even hourly) as I plan and prepare. I'm just getting started on the 2013 to-do list and it's already filling up! Feel free to share your organizational tips below!
September 07, 2012
 Preparing for any tradeshow, let alone the National Stationery Show, is no easy feat. As I've mentioned here before, participating in Tradeshow Bootcamp was one of the best decisions I made prior to NSS. I went into my first tradeshow feeling confident and prepared directly because of the knowledge I gained in TSBC sessions.
Kelp Designs' Katie Hunt launched Tradeshow Bootcamp as a way to help newbies learn the ins and outs of participating in a show like NSS. The workshops cover topics like planning your booth layout, learning the lingo of selling wholesale to retailers, and how to pitch your product at the show.
Katie just announced the Fall 2012 workshops. She has an amazing lineup of industry insiders and veterans participating in the series. If you are a stationery designer even considering NSS for 2013, I highly recommend checking out TSBC!
July 16, 2012



May 31, 2012


May 27, 2012
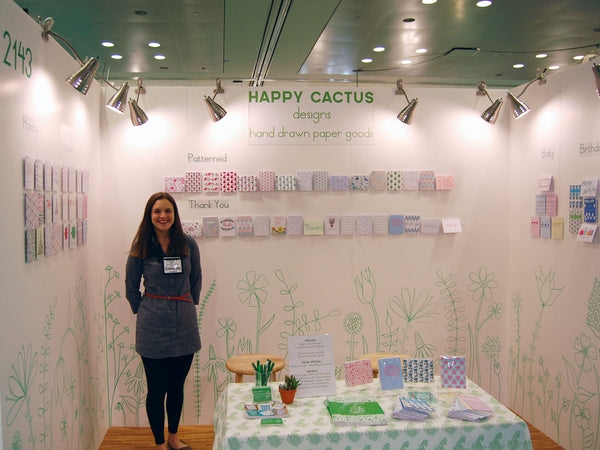
I wanted to share the details of my booth design for the National Stationery Show! When I was planning to exhibit for the first year, I found other stationery companies' blogs with similar posts be extremely informative and helpful, and I wanted to do the same for anyone out there thinking of jumping down the tradeshow rabbit hole.
The Walls
Since this was my first year to exhibit, I wanted to keep things simple, while still doing my best to show off my designs. I had Manny Stone do white foam core walls, and then used velcro dots to adhere the cards to the wall. The genius to leveling all of the cards and keeping things straight - tape measure washi tape! This was probably my best pre-show purchase. It made lining up the cards beyond easy. I didn't have to worry about making marks on the walls or the top layer of the walls peeling off. (See similar here.)


My favorite part of the booth was the hand drawn walls. I actually hadn't originally planned to do this. Given that all of my designs are hand drawn, I thought it would be both eye-catching and a great talking point to have large-scale hand drawn flowers along the walls. We ran out and got thick permanent markers, I sketched a rough design on a sheet of paper, and then went to town on the walls. There was no turning back once I started!

Lighting
I purchased clamp lamps from Home Depot. I had heard from many past exhibitors that lighting is one of the most important features of your booth, and I wanted to make sure that my designs were well lit. Each lamp was 60 watts, and the combined light from 8 lamps proved to be perfect. Being under the lower ceilings of the Javits helped keep things on the brighter side, too.
Flooring
For flooring, I used interlocking foam tiles. Armed with a generous discount code, I was able to purchase the tiles for a great price. They proved to be very comfortable to stand on all day and I even had retail buyers remark about how nice the floor felt!
Signage
I originally had a vinyl decal of my company name and tagline that I intended to place on the back wall, but I got freaked out that would completely ruin it since each tiny letter was a separate piece. I ended up using a canvas sign that I had also printed. I did end up using vinyl decals for my booth numbers. Next year, I definitely want to have a better/cooler sign made.
Furniture and Accessories
Since I live far from NYC and wasn't shipping a pallet of goods, I needed to keep the furniture simple and as inexpensive as possible. I rented a small table from Freeman and had a fabric runner/topper made with my paisley print. I used a flame-retardant full-length tablecloth beneath it. Hidden under the table were storage cubes holding all of the supplies I needed during the day. Next year, I think I'd want something a little more accessible, as I found myself fishing under the table a lot. We picked up two wooden bar stools at a nearby department store to perch on during the day.
On the table, I displayed some boxed sets of cards and some singles so buyers could see how items were packaged. I also had a sign with details about my products (pricing, minimums, show special, etc.). I was a little worried about putting all of that out there, but buyers seemed to appreciate it. I also had business cards, extras of my pre-show mailer postcard, and my catalog. One of the best things I did was to putting all of my cards on large key rings. I found that buyers really liked to flip through them so they could touch the cards, look at designs up close, find their favorites, etc.

I was really pleased with how the booth turned out. I received many compliments that the design was fresh, bright, and appealing. I was also very lucky to avoid any major disasters or errors (I've heard some crazy stories of leaking and walls falling). And, of course, I'm already thinking of plans for next year's booth design!
May 12, 2012
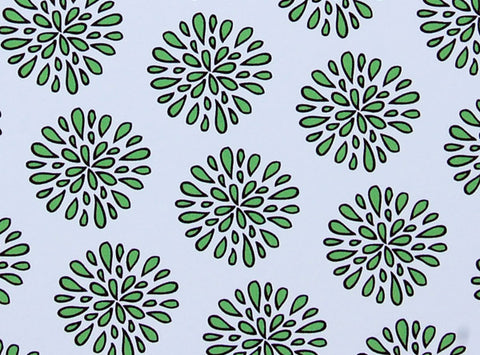
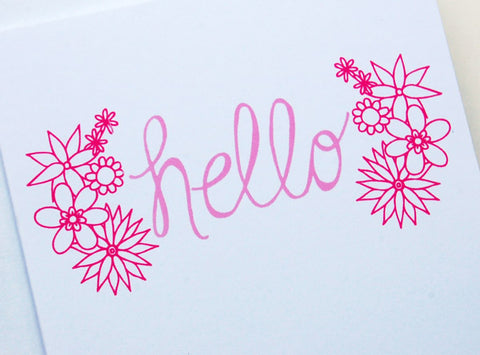
We're busy bees running lots of last minute errands for the Stationery Show and packing everything up! With so many new designs debuting at NSS, we spent a lot of time photography products. Here's a few close up shots!



May 05, 2012
It’s hard to believe The National Stationery Show is merely days away! Happy Cactus Designs officially launched in September 2011, and our sights have been set on exhibiting at NSS ever since. Preparing for the show is not for the faint of heart. Here’s a brief breakdown of some of what has gone into preparing for the show.

Designs
Since
Happy Cactus launched last year, it was pretty clear which of our
designs were the bestsellers and really represented the brand well
(including Garden Blues, Happy Birthday Blue Blooms, Welcome Baby
Elephants, Budding Pinks, and Heart Drops). That said, I was eager to
build out the collection. Over 70 designs will be making their debut at
NSS this year, including a bevy of new patterned and thank you cards,
colorful designs for special occasions (think Mother’s and Father’s Day, Congratulations, Christmas, Hanukkah), and even more Birthday and Baby cards.
Booth
Perhaps
the most ambitious part about exhibiting at NSS is pulling together a
booth design. Since Happy Cactus Designs’ work is so colorful and
pattern-driven, the choice was made to keep our booth clean and simple.
I’ll share a full breakdown of the different aspects of the booth (and
photos!) post-NSS.
Networking
One
thing I did not expect when I launched this company was the number of
wonderful stationery designers, store owners, and consultants to the
industry that I would have the pleasure of getting to know. Everyone has
been so supportive, welcoming, and encouraging of one another, and I
cannot wait to meet my new friends in person!
A
lot of this “getting to know you” has taken place on Twitter and
Facebook. It’s awesome to have a sounding board to bounce ideas off of,
to ask stupid questions, and to support. A huge component of this has
been Tradeshow Bootcamp, founded by Kelp Designs’ Katie Hunt. Katie
created TSBC as a resource for newbies like myself to learn the ropes,
and has done as amazing job pulling together NSS veterans to guide us
through the process.
Marketing
While
I wish I could spend all day doodling, designing, and creating new
products, I end up spending a lot of my days wearing different hats.
While you may think just having a booth at NSS is enough, a lot of prep
goes into the before and after, and I’ve been wearing my marketing “hat”
a lot lately. Pre-show postcards announcing my company’s debut, booth
number, and show special were designed and sent to a carefully curated
list of wonderful stores across the country. The Happy Cactus Designs’
website underwent a revamp and I’m thrilled with the end product. New
business cards were created, too.
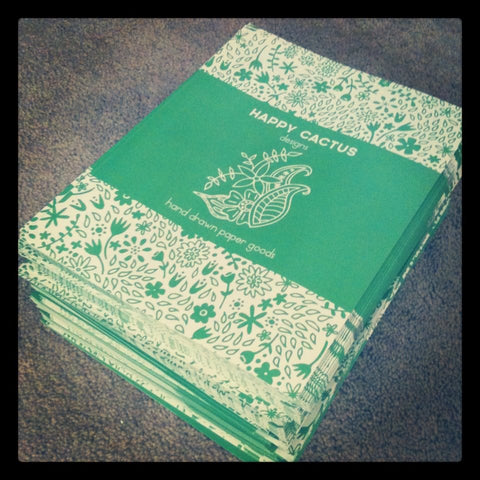
Perhaps the most ambitious undertaking was creating and designing a catalog of my entire collection. This included taking styled product photography, learning an entirely new program to design and layout my catalog, and figuring out the details of printing the darn thing. Fortunately, the catalog turned out beautifully (you can flip through it digitally here), and I can’t wait to share it with retailers!
