I've blogged here before about experimenting with Facebook ads, also known as "boosted" or promoted posts, where you pay a little bit of money to ensure your Facebook posts are seen by more of your followers and their friends.
Recently I've been reading about more and more small businesses who have grown aggravated with Facebook's "pay to be seen" strategy, and I've joined those ranks.
I understand Facebook's desire to make money, but their constant tweaking to the feed algorithm, coupled with the newfound inability to get a post seen by more than a small portion of people who have already chosen to like and follow your business page, has made me grown tired and weary of using Facebook as a way to promote my business.
Another troubling problem is Facebook's system for approving ads. I sell stationery and greeting cards. Many of my cards have a text-based greeting on the front. Yet every now and then when I "boost" a post, the ad immediately gets rejected. Why? Per Facebook's terms, "Ads that show in the Feed are not allowed to include more than 20% text." I end up having to fill out forms and go back and forth with Facebook staff to explain that the text is part of my product, not promotional text, and request that the ad be re-approved. There seems to be no way to get around this issue.
Below is an example of the most recent of my ad that was rejected for this reason.

Ross of Fifty Five Hi's, a buddy of mine in the industry from Tradeshow Bootcamp, shared this video that does a great job explaining the flaw in Facebook's system.
As I plan marketing strategies for Valentine's Day and upcoming promotions, it's hard to figure out how I want to incorporate Facebook into this strategy. Part of me is considering leaning more heavily on Pinterest and Instagram to share what's going on, but it is hard to ignore my Facebook fanbase.
What do you think? Have you struggled with getting your posts seen on Facebook?

As a small business owner invested in using social media platforms to share news about my company, I'm always trying to figure out the best way to share my content across the various channels.
It seems that many businesses lump all "social media" together and think that as long as you cross-post your blog post to your Facebook page, Twitter account, and Instagram feed, you've covered your bases. While this is one strategy, it ignores the fact that to be a more effective marketer and better engage followers, you need to tailor your content to each specific channel and its set of users. The way your followers use and interact with Twitter is probably different from how they use Instagram. And these days, users are savvy enough to tell when you've just hit the "Share to Facebook" button rather than taking a few moments to reconfigure the content for that particular audience.
Here's an example of how I might share a new Valentine's Day product:
On Pinterest: The image is king on Pinterest, so I make sure to pin the most compelling and vibrant image I have of the product on my site. I then craft a strong description using keywords so it's more likely to be discovered and re-pinned.
On Instagram: Again, the image is king. For product photos, I've found that having a vibrant background (a bright color or a texture) often helps a product stand out in the stream of photos. Hashtags are also helpful for guiding people to your content. You cannot hyperlink to URLs within an Instagram description, so I recommend adding "see link in profile" to direct followers to a particular site.
On Facebook: I make sure to upload an image that is the optimal size for Facebook. I can tweak the description I used on Pinterest and adapt it for my Facebook crowds by asking a question, asking followers to "like" or share the image, or including a link to my site where they can shop the product.
On Twitter: I try to provide the appropriate context, use a link shortener to maximize the number of characters I have available, and occasionally use hashtags to make my tweet more discoverable.
One final tip: Review your settings on each of your social media channels to see if you are auto-Tweeting when you Pin or automatically updating Facebook when you post a photo on Instagram. Nothing will drive your followers crazier than when you go on a Pinning spree and their Twitter stream is overloaded with tweets about your pins, so be careful about your settings.

I've had this Seth Godin quote scribbled on a sheet of paper and tacked to my bulletin board for awhile now. It's a quote from his Creative Mornings talk in 2013.
In any industry, it's easy to get caught in a trap of envy and anxiety. I feel like I encounter these emotions a lot in the design industry - from myself personally and from speaking with others - wondering how your works stands up against the rest, trying to figure out how some designers seem to have "effortlessly" become successful overnight, thinking about how to stay true to yourself.
It's hard to not compare yourself to others. I attribute a lot of the anxiety designers seem to experience to the constant stream of updates we receive from social media, where we are bombarded by images of others' work and, usually, their "best" selves or top moments.
I particularly like Godin's quote because it serves as an important reminder that nothing happens overnight. That you define your own sense of success. And that, from the outside, you never know the actual story of someone else's "success" (or failure).

When I first began Happy Cactus, all of my designs were one-of-a-kind, hand-drawn and hand-colored by me. Knowing that I wanted to produce cards in greater quantities at a faster rate, I was well aware that I needed to learn how to use Photoshop, Illustrator, and other Adobe programs. These programs would allow me to manipulate my scanned drawings, color them, make patterns, and lay them out so they are print ready.
I decided I needed to dive in and learn how to use the Adobe Creative Suite of software programs on my own. Many people are surprised to learn that I was able to become proficient in using these programs without some formal classwork. I was moving across the country at the time, so I taking an in-person class was not an option.
Here are the resources I recommend if you have little to no experience with Adobe's software and have the initiative to teach yourself and practice your skills on a daily basis.
YouTube - It takes a lot of time to search through the clutter on YouTube to find the right tutorial. I recommend searching by keywords. For example, when looking for a video on how to make patterns using Illustrator, I would search "tutorial Illustrator patterns" and sift through the results. The quality of the videos vary, but I was usually able to find fairly good explanations of techniques.
Adobe - Adobe hosts a number of tutorials on their site. These are great starting points if you are looking for technical help, are just getting started, or want to learn some basic skills.
Lynda - Lynda was my best investment when I started out learning Adobe software programs. For a minimal monthly fee, you get unlimited access to high quality video tutorials. For the classes I took, the teachers provided clear, detailed instruction and many provided practice files. I designed my first wholesale catalog using InDesign without any previous experience solely using Lynda tutorials.
Skillshare - Skillshare is a newer website where experts from a variety of fields teach informal online classes. Classes are fairly inexpensive and usually focus on pretty specific topics. For example, if you want to learn how to digitize your own hand lettering, there's a class for that taught by Sean McCabe, a well-known hand lettering artist. Skillshare didn't exist when I was first learning these programs, but I've taken a few classes over the past few months to develop my skills and learn new techniques.
Through these various online resources, I now feel confident working on a variety of projects, from retouching product photos to creating a catalog to laying out greeting cards.

Posting photographs on your business' Facebook page is a great way to attract customers and share products. The tricky part is knowing what size photos work best on the site. I've pulled together a quick list of all of the various photo sizes for posting and sharing images on Facebook. Here's a cheat sheet to help you out!
COVER PHOTO: Displayed at 815 pixels by 315 pixels. You can upload a photo double that size (1702 pixels by 630 pixels) for better quality and Facebook will resize it. Facebook lets you have up to 20% of the photo have text in it. Read more about the do's and don'ts of cover photos here.
PROFILE PHOTO: Displayed at 180 pixels by 180 pixels. If you upload a rectangular image, it will be cropped on the sides so it fits to the square shape. It's important to remember that your profile image will be seen around Facebook - on pages you like or common on and in your fans' newsfeeds, so make it eye-catching!
PHOTO ALBUMS: Displayed at 960 pixels by 720 pixels up to the maximum upload size of 2048 pixels by 2048 pixels. When you upload photos to an album, check the "high quality" photos box so you are posting the highest resolution photos to your page.
TIMELINE PHOTOS: Displayed at 403 pixels by 403 pixels. Keep in mind that if you have rectangular images, it will only display the center of the image, so keep the most important content of the photo in the center.
APP ICONS: Displayed at 111 pixels by 74 pixels. I recently designed custom icons for the Twitter, Newsletter, and Shopping apps on my Facebook page which makes my page more cohesive and pleasing to the eye. Here's an easy tutorial for creating your own icons.
Read more small business posts about using Facebook here.
How often do you feel like you are running out of desk space? I felt like I was constantly making crazy piles and losing track of important pieces of paper because of my disorganized desk. I went on an expedition to find fun and functional items to organize my workspace, and these three desktop items have totally transformed my desk into a more clean and organized space where I can actually do work!


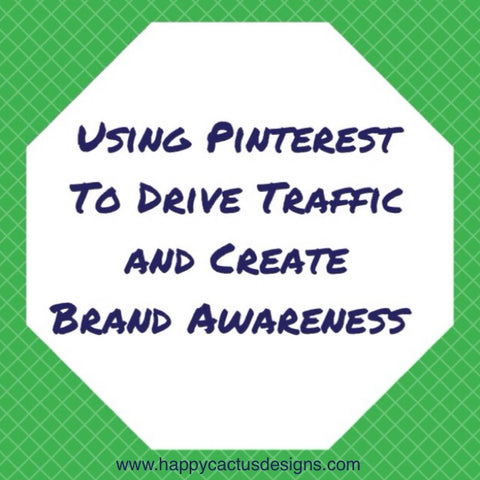
Lately I've been seeing more and more news about the power of Pinterest to drive sales and boost brand awareness. There's no doubt that Pinterest has become a key tool in the social media marketer's toolbox. With over 70 million registered users and a growing audience in Europe, there's wonderful opportunities to harness Pinterest to raise brand awareness and increase the potential for sales.
According to recent research, 21% of Pinterest users go to the store to buy an item they liked or pinned, and nearly a quarter of socially-generated online sales these days comes from Pinterest. I didn't expect numbers this high! From a quick review of my own Google Analytics, the largest driver of traffic to my site from social sources is Pinterest - double the amount from Twitter and five times the number of visitors from Facebook.
Well-known companies are also becoming savvier about how they promote their brands on Pinterest. For example, J. Crew recently used the site to share sneak peeks of new items in their Fall collection. Many companies also aim to not overload their Pinterest boards with only pins of their own products. Rather, they create boards sharing other images that are inspiring and in line with their aesthetic and brand identity. Two such examples are West Elm's "Dream House of the Day" board and Poppin's color board. Etsy has "guest pinners" that create their own boards with products from the marketplace. Pinterest is impacting offline marketing as well. Nordstrom places tags with the Pinterest logo on products in-store to identify them as popular on Pinterest.
Just as "Pin It to Win It" competitions are becoming more prevalent in the marketplace, Pinterest announced last week that it has begun experimenting with Promoted Pins.
With Pinterest's continued growth, should small business owners spend less time focusing on Twitter and Facebook for social promotion and instead turn their attention to building a Pinterest audience to promote their brands? What strategies are you using to promote your brand on Pinterest?
P.S.
Looking to learn more about using Pinterest for small business? Check out my tips here.
As I've built my business, I've sought out and come to depend on a number of apps and cloud-based programs to streamline my business procedures and make my life easier.

Here's some of my favorite services that I highly recommend:

Did you know that Happy Cactus Designs products are 100% made in America? Every component, from the paper to the packaging, comes from U.S.-based businesses. Our printing is done locally in the South, our 100% recycled envelopes are sourced from New York state, and our product packaging comes from California.
Being as eco-friendly as possible is also very important to Happy Cactus Designs. Our cards are printed using processes such as low-emission and low-chemical printing and we use papers from properly managed sources that are Forest Stewardship Council (FSC) certified and made using Green-e certified wind power. Our envelopes are made from 100% post-consumer waste (recycled content) and are also FSC certified. Our clear card sleeves are also made of recycled content. We try to reuse packing materials whenever possible for shipping needs. We also encourage you to re-use cards! The printed designs can easily be cut into smaller pieces and used as gift tags!
This year at the National Stationery Show I had the pleasure of meeting a number of artists and designers walking the show. Many asked how I decided to do the show and what it takes to get there.

There's no "right" or easy path when it comes to deciding to exhibit at the show, and each person's decision is completely different from the next as it is a very personal one. That said, if you are contemplating having a booth at NSS in the future, here's a few bits of advice:
- Set goals. Think about your company and where you want to be. Spend a lot of time thinking about where you see yourself in six months, one year, five years, etc. Will exhibiting at the Stationery Show help you get there? How?
- Develop an understanding of the wholesale world. Wholesaling isn't right for everyone and is very different from selling directly to retail consumers. If you are new to wholesaling and also considering doing the Stationery Show, start thinking through some of the systems and processes you will likely need to set up. Do you have the ability to scale up your production and fulfill orders to retailers in a timely manner? Can you appropriately price your products for the wholesale market? How will you keep track of your orders and contacts? How will you package and ship your products? Will you be able to release new designs consistently throughout the year? Lots to think about!
- Be prepared to show a full line of cards/products. Having just 12 cards won't cut it at NSS. You are expected to have a complete line covering many different categories. From different people I've spoken to, I've heard you should be prepared to bring anywhere from 30 to 75 unique designs to present at the show. You want your walls to have ample product on display and for buyers to see that you are committed to your art.
- Do a lot of research. I learned a LOT about the show by looking at photos and reading summaries online. Blogs like Paper Crave, The Stationery Place, Design Sponge, and Oh So Beautiful Paper do a wonderful job covering the show each year. Many designers share their experiences on their own blogs or Facebook pages as well. The Center Aisle Group has also published a book about preparing for this tradeshow in particular that should be on your must-read list. If you can swing it, walk the show (the show management allows artists to purchase passes to attend the show) and take it all in.
- Invest in workshops and networking opportunities. I've shared before how invaluable Tradeshow Bootcamp has been and continues to be in preparing for and navigating NSS and the stationery industry in general. I've also greatly benefited from working with business consultants, industry experts, and educators including The Center Aisle Group, Joyce Wan, and Rena Tom. Each opportunity has been well worth the investment as I've learned a TON while also building a network of friends and supporters at the same time.
- Meet other designers. I've made a number of good "paper" friends who are not only wonderful people and amazing designers, but also a great resource when I need feedback about preparing for NSS or working with retailers. Find other designers that live near you and ask them to meet up, or email a few designers you admire and see if they would be willing to answer some of your questions.
Have more questions? Feel free to contact me at hello{at}happycactusdesigns.com and I'd be more than happy to answer them!

Since I launched Happy Cactus Designs, I have been very fortunate to have my products featured on a number of design, stationery, and lifestyle blogs. I'm often asked how I have managed to be featured on such wonderful blogs, so I thought I'd share a few tips here.
1. Be familiar with and actually read the blog you are approaching.
When I started my company, I was already an avid reader of many of these types of blogs. Once I launched my collection, this came in handy because I already had a number of blogs in mind that I felt would be a good fit for my products. You can only figure this out by actually reading a blogger's posts to see if your items would be something they would be likely to share about.
2. Read the blogger's FAQs and submission details.
Many bloggers include detailed information on their blogs about what types of submissions they are looking for, how you should approach them (even down to what the email subject line should be), and what size photographs they prefer. Search around on the blog's site - you can usually find this information under Contact, Submissions, or FAQs.
3. Follow the steps for submission!
Now that you know the requirements for submitting a product, follow these steps! For example, if a blogger requests that all photographs should be 72 dpi and at least 600 pixels wide, then re-size your photos accordingly! Adhering to their guidelines and following their directions for submissions helps the blogger and increases the likelihood that he or she will consider your pitch.
4. Pay attention to the calendar.
This is especially important when it comes to stationery and paper blogs that often feature product posts related to specific holidays or events. Bloggers need plenty of lead time so they can organize these types of posts. Want to submit a Christmas card to a blog? Don't wait until a week before Christmas. Instead, plan to submit at least a month ahead of time. Many bloggers plan their editorial calendars weeks in advance and won't be able to consider your submission if you send it in too late.
5. Follow up if need be, but don't be a pest.
Once you hit "send" on your email to a blogger, you may get an auto-reply thanking you for your submission and details about what will happen next. Alternatively, the blogger may respond to you personally. If you don't hear from a blogger in a week or two, you can send a quick and brief follow-up email to check in. Don't be surprised if you don't hear anything, though. Maybe you product just wasn't a good fit or the blogger doesn't have the ability or time to respond to every single request.